How to Setup and Import ECO changes with 3DQPress inside SolidWorks
Welcome to Setup and Import ECO changes inside unfolded 3DQPress model.
After the model has been imported SOLIDWORKS assigns a different ID code to every model. In this blog, I will explain the 3DQPress process on how to use the original model, import the ECO changes, and then update the unfolded model.
Setup
1. Import the model, and then save the file name as needed then close the file.
2. Using SolidWorks open a new part file.
3. From the top ribbon select InsertPart.
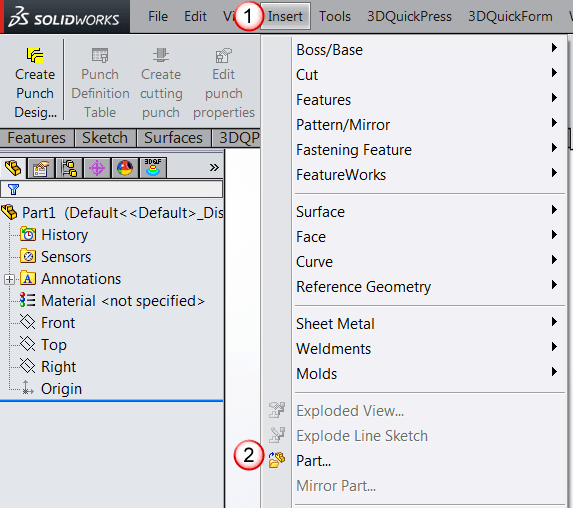
4. Select the rename imported part and click the check OK.
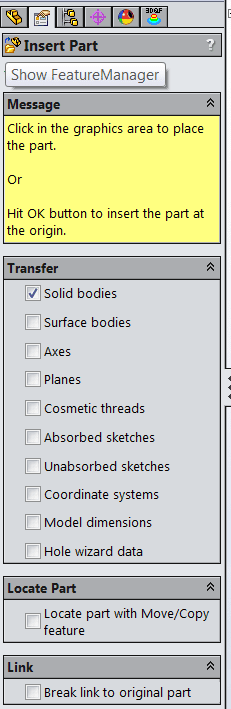
5. SolidWorks opens the insert part options dialog menu as shown below.
6. The only transfer we need is the Solid Bodies.
7. After completing the process, now we have a part file referencing the original model that was imported.
8. The user can tell the reference is active by the -> shown in the tree by the part file.
![]()
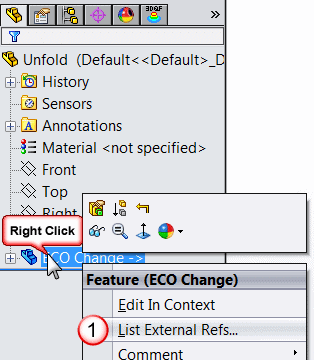
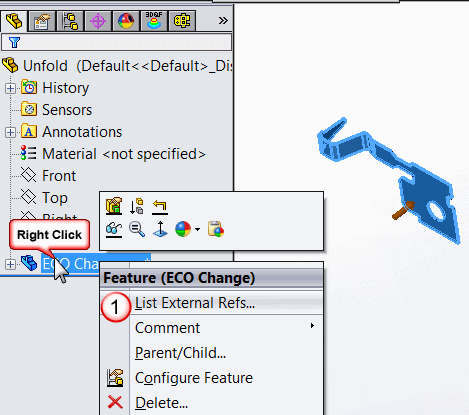
9. The next step is to lock the reference.
10. Right click on the ECO change part in the tree and select from the menu List External Reference.
11. From the External Reference menu select Lock All.

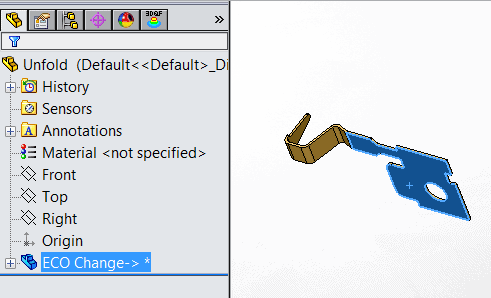
12. After selecting the Lock All, SolidWorks lock the reference to the original imported model by the ->* shown in the tree by the part file.
![]()
13. Now the model is ready for the 3DQPress Unfolding process.
3DQPress Unfolding
1. Start the Unfold process by selecting 3DQPressicon on the 3DQPress Unfolding toolbar.
![]()
2. Select the highlighted face as the fixed face; click OK to start unfolding the model.
3. Click OK to accept the bend allowance.
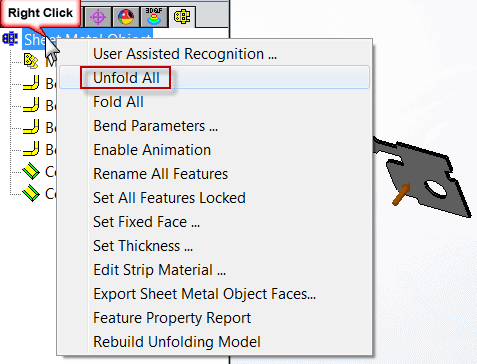
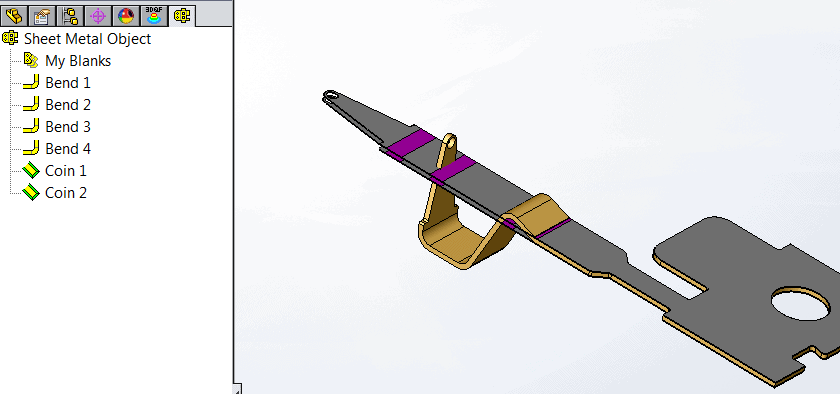
4. Right click on the Sheetmetal Object and unfold all.
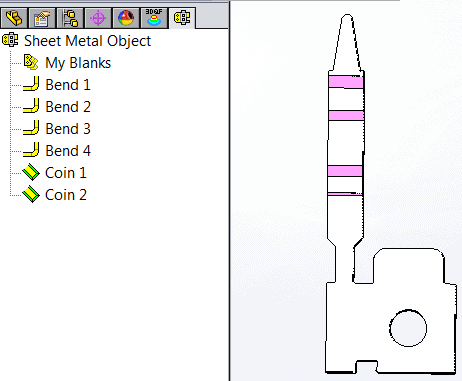
5. Now the model is ready for the ECO change.
ECO Rev B Imported
1. Import the new ECO model into SOLIDWORKS and save the part file as the revision. Caution: Be careful not to re-name the new model same as the original.
2. Open the original model.
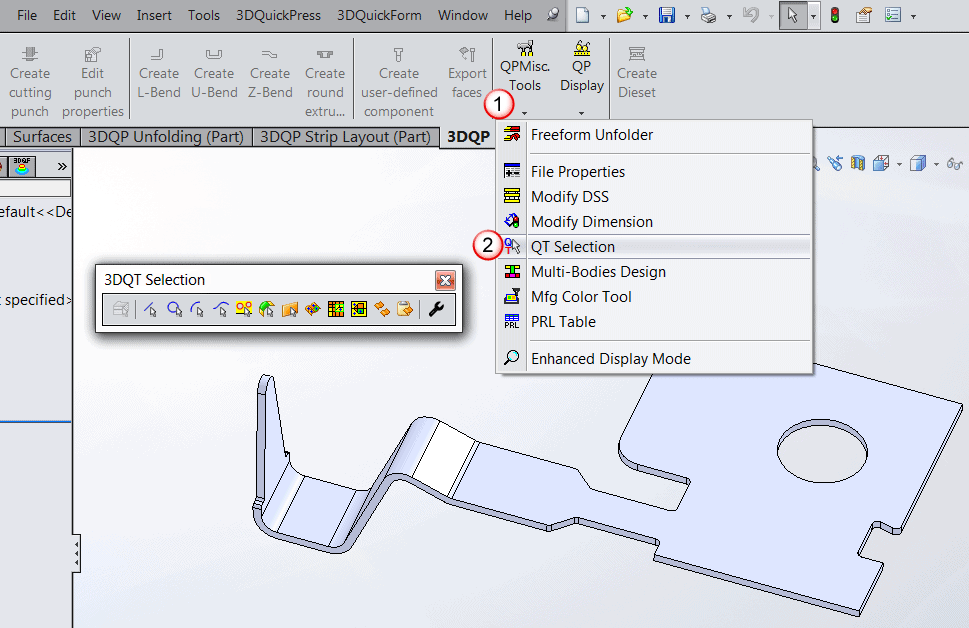
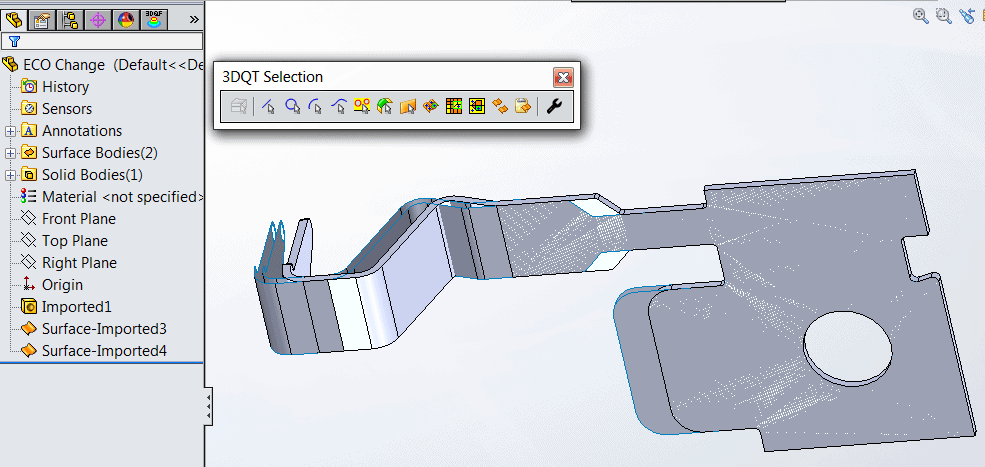
3. From the 3DQPress Punch Design toolbar select the QPMisc. Tools.
4. From the pull down menu, select the QT Selection toolbar.
5. Right click the top face of the ECO Rev B model and select tangency.
6. Roll the model to the other side, hold the Ctrl button and right click the bottom surface, select tangency.
7. With the top and bottom surface highlighted, select from the 3DQPress Selection menu the copy surface icon.
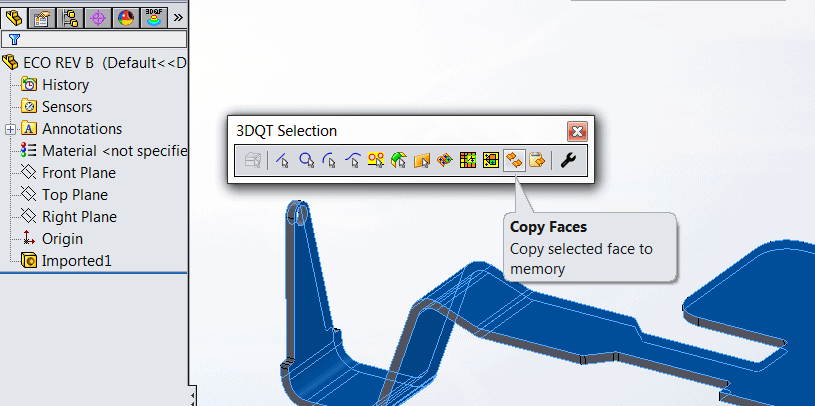
8. The 3DQPress Copy Faces command will save the selected surfaces to the notepad referencing the Origin location of the model.
9. From the SolidWorks top ribbon, select Window to open to the reference file ECO Change.
10. With the 3DQPress Selection menu still open select the paste faces command.
11. 3DQPress imports the top and bottom surfaces from the ECO Rev B model at the same Origin as the reference model.
12. Now the Referencing model can be updated to the new ECO Rev B change, and because the ref. is still locked it will not affect the unfolded model until you unlock the referencing updating the model when you decide limiting the affects of the SolidWorks ID.
13. Reorder the surfaces in the tree above the Imported1 feature.
14. Make the changes to the model referencing the surfaces using SolidWorks modeling techniques, and then hide all reference surfaces.
Update the Unfolded Model with ECO Rev B Changes
1. With both models open in SolidWorks, right click on the ECO Change part file.
2. From the External Reference menu select Unlock All.
3. The model will update adding the ECO Rev B change.
4. Select the 3DQPress Unfolding tab and Show Original Solid and Show Unfolding Model.
5. With both models showing, you can see the difference in the undated model and the “waiting on a rebuild” 3DQPress Model.
6. When you are ready, right click on the Sheet Metal Object and select rebuild to add the ECO Rev B update.
Ronnie C Flaugh
Technical Analyst