Thermal Analysis in SOLIDWORKS Simulation
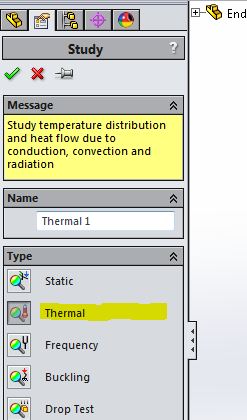
Thermal studies in SOLIDWORKS Simulation are actually very easy to create. In Simulation, just go to New Study and select Thermal.
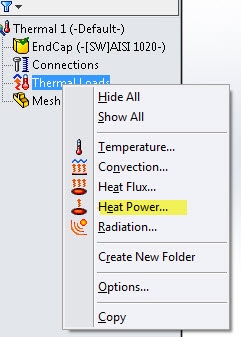
At this point you would need to assign a material to your part if you do not have one. Once the material is assigned, you will need to add your thermal loads to your study. In this sample case, we are going to perform the analysis on the End Cap of an underwater camera. The analysis will determine the amount of heat lost to the surrounding seawater. To simplify the model, the camera and lighting system are represented as a concentrated heat source.
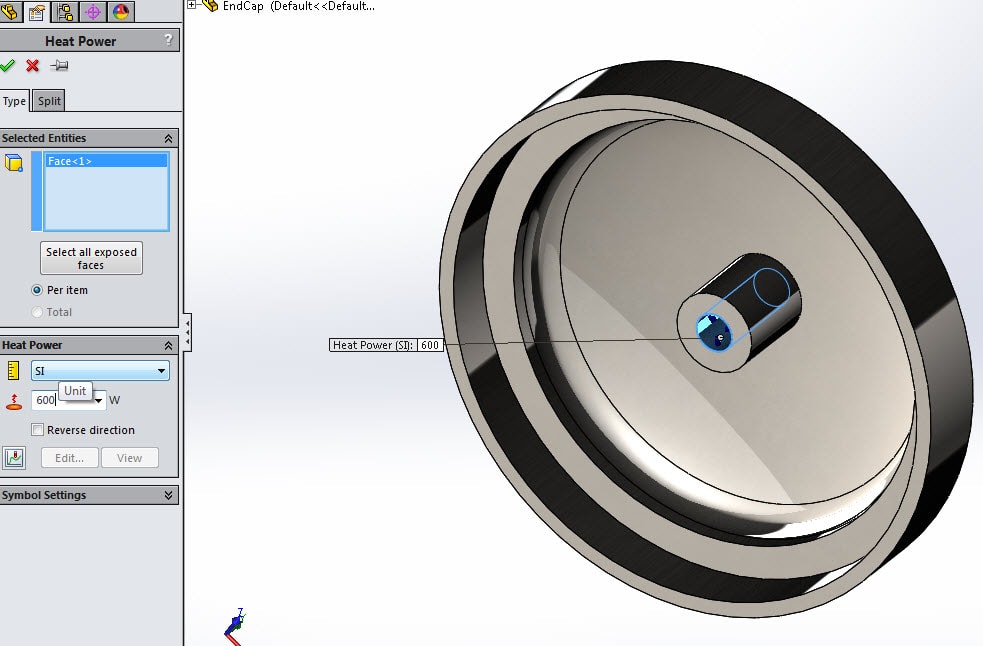
We will select Heat Power first to simulate the interal camera and lights. Once you select Heat Power, you need to select the faces that are affected by the heat. In this case, we will select the internal hole. I also need to select the units and the amount of power (600 Watts) generated by the camera and internal search lights.
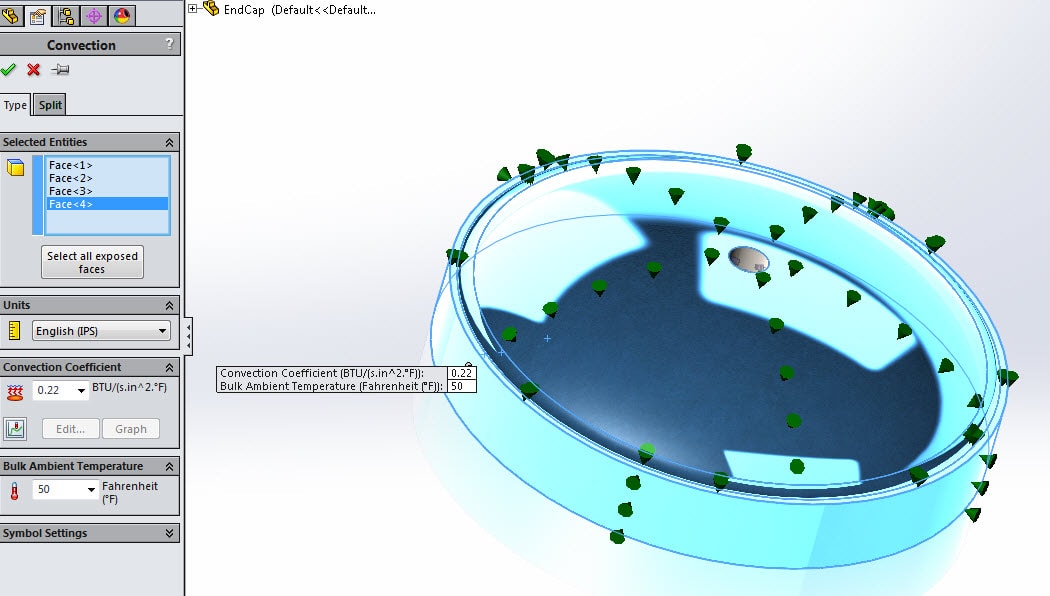
Next, we need to select Convection to simulate the temperature of the outer faces of the End Cap. The values we input simulate seawater conditions at the operating depth of 3,400 feet.
Once the Convection load has been entered, we can now mesh and run our simulation.
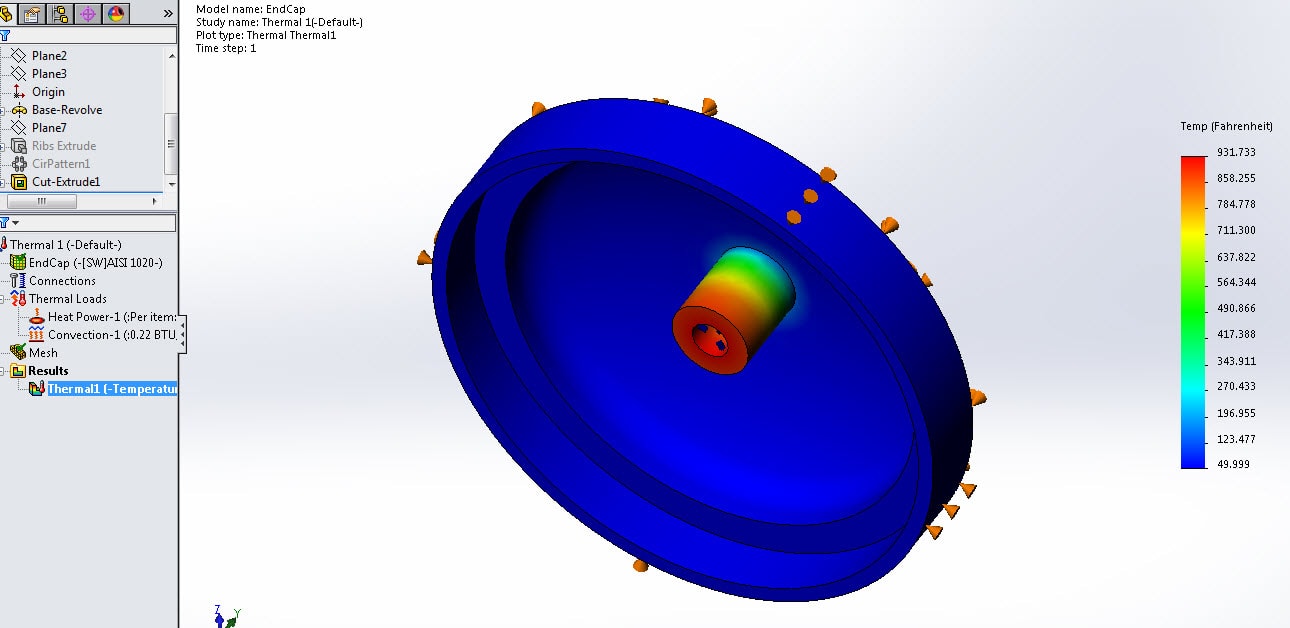
We can see by the results, the internal hole of the End Cap gets pretty hot at around 930 degrees.
What happens if we change the design to use more of rib approach? Does it affect how the heat is
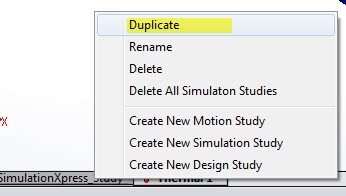
dissipated? Lets make the change and see. All we have to do is change to the configuration that has the ribs present. Since we have already run this analysis once on the part without ribs, we can copy this study and all of the parameters. Just right click on the Thermal tab at the bottom of the screen and select Duplicate. This reduces the time to test different variable in your design.
Once the new study is created, just change the configuration to the one you want and mesh and run the study.
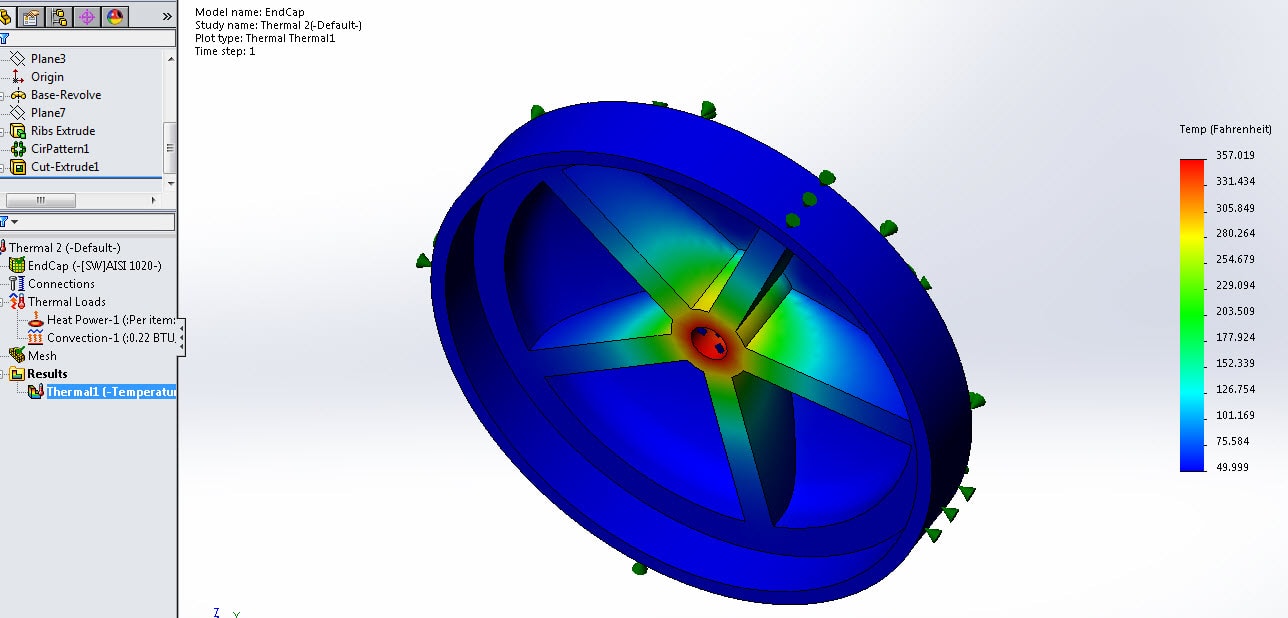
You can clearly see that the new rib design does a much better job of spreading out the heat so it is not concentrated in one area and greatly reduces the temperature in the End Cap. The hottest area is now only around 360 degrees.
SOLIDWORKS Simulation offers you a great deal of tools at your disposal to help you design better, more cost effective products.

 Blog
Blog 