SOLIDWORKS Copy With Mates...Have you forgotten this command?
We all have our favorite commands and often forget about some really useful ones because we get stuck in a modeling routine. Most times when I teach Assembly class, there is an "AH HA" moment when we do a case study about the SolidWorks "Copy With Mates" command. This valuable tool allows you to copy multiple components to create new instances with mates. The mates are based on the mates of the "seed"component or components that get modified to suit a new condition.
Let's investigate…
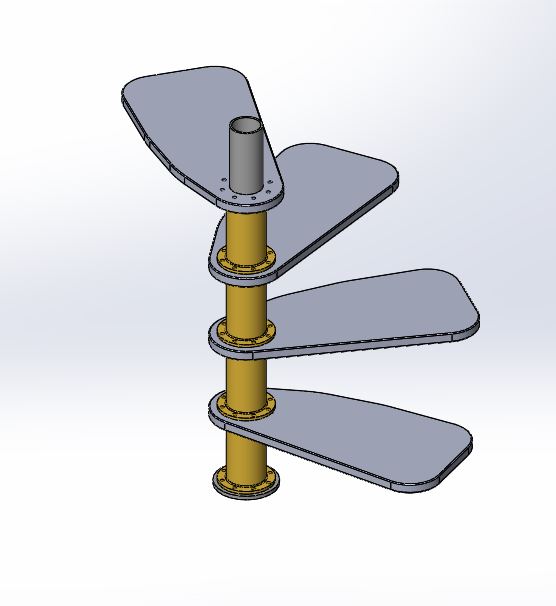
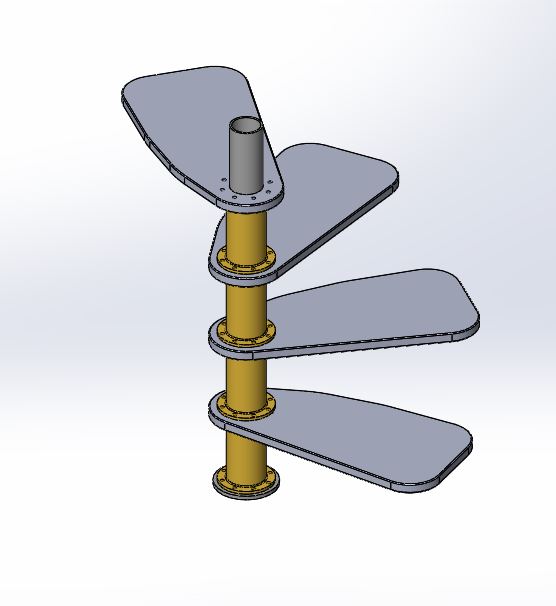
Here is a view of a 4 step spiral staircase.
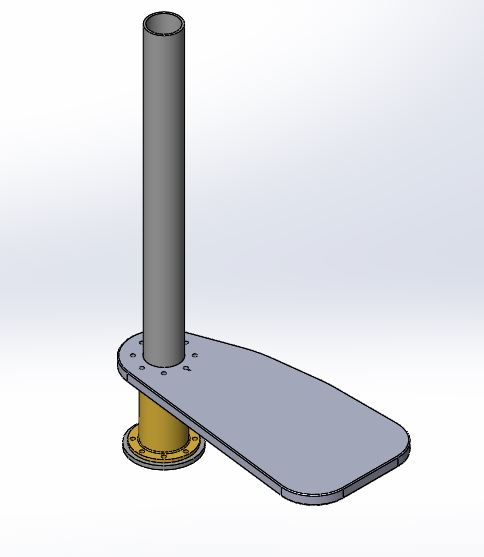
We begin our assembly with the Pole. We add the Pole as our first assembly part. We then add the spacer and lastly, the stair. Through mates, we add and constrain the Spacer and Stair.
Before using the Copy with Mates command, investigate the mates by viewing the existing mates used to constrain the first 3 parts:
The Concentric11 mate is between the outer face of the center pole and the inner face of the spacer.
The Concentric2 mate is between the outer face of the center pole and the innee face of the step.
The Coincident1 mate is between the upper face of the center pole flange and the bottom face of the spacer.
The Concentric3 mate is between the bolt hole of the center pole flange and the bolt hole of the spacer.
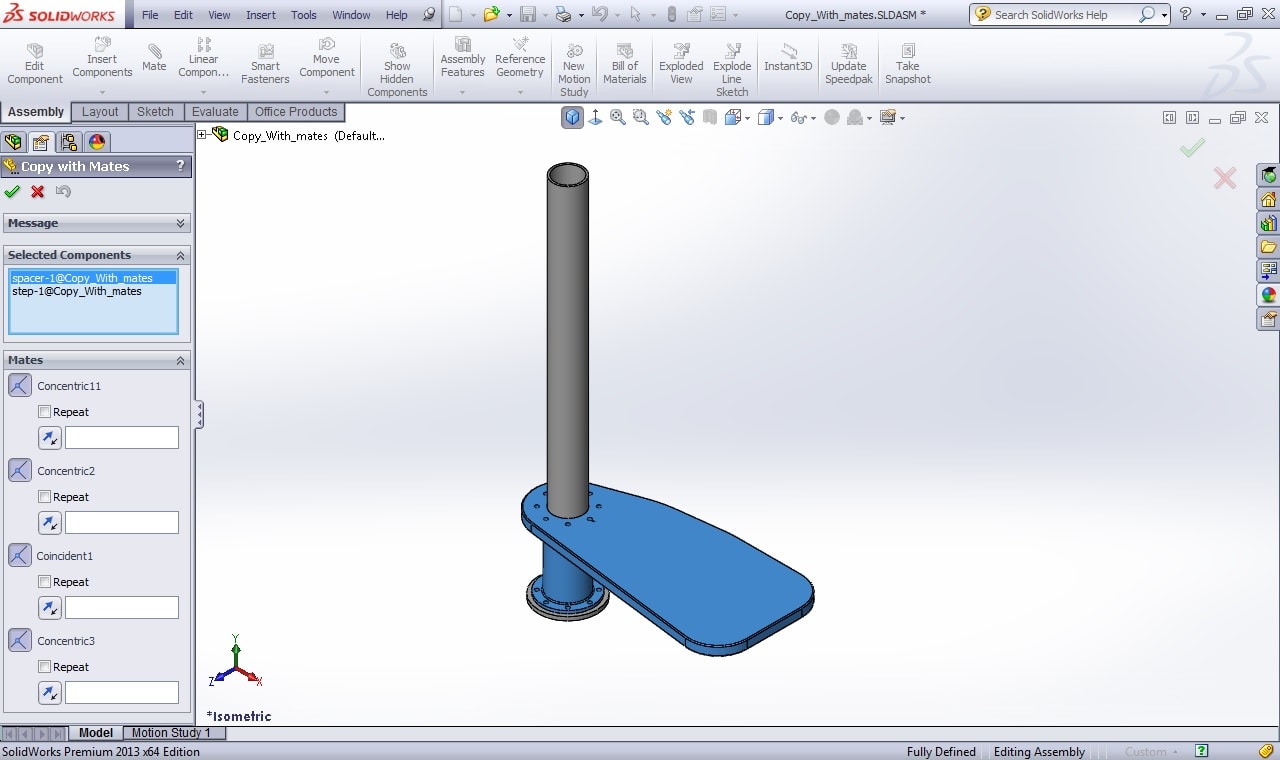
Next, go to Insert Components in the Assembly Command Manager and Select Copy With Mates.
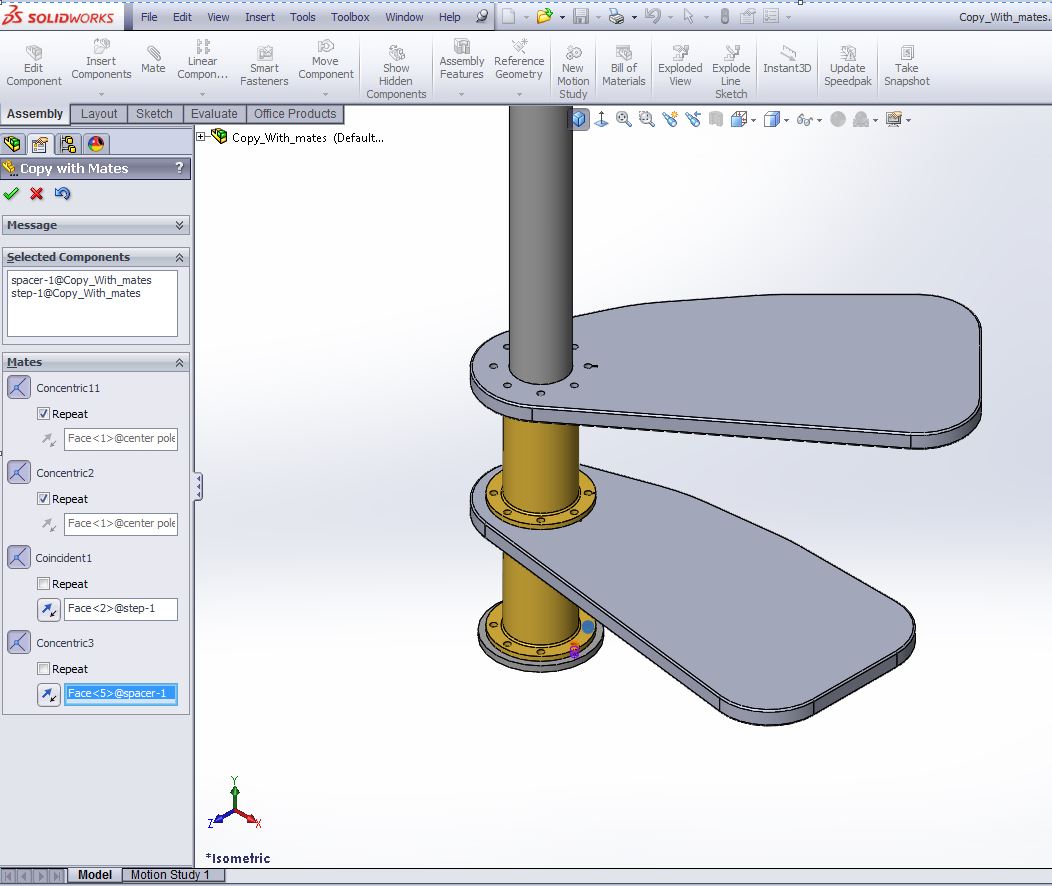
The Copy with Mates Property Manager window will appear with 4 mates shown. The mates listed are those required to copy and mate the selected components. They are Concentric11, Concentric2, Coincident 1 and Concentric3.
HIghlight the Selected Component box and pick the parts that you wish to copy with mates. The Spacer and Step are selected.
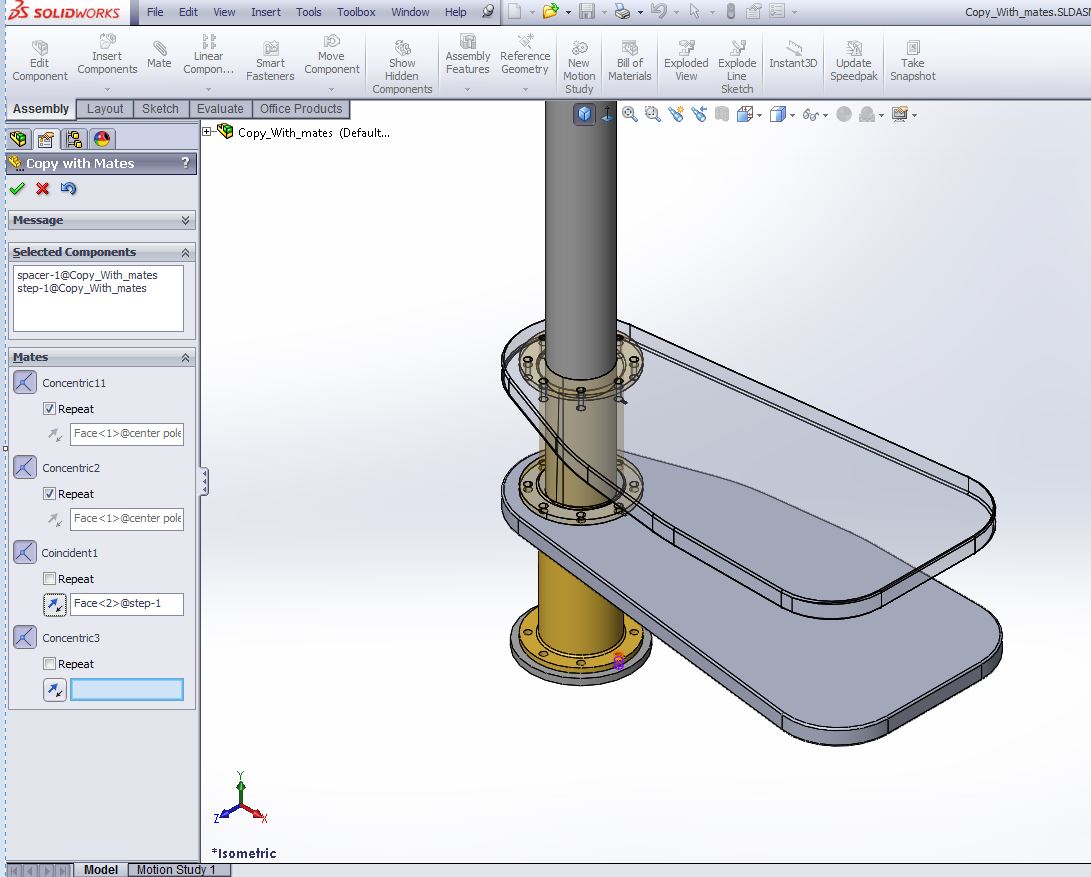
Pick the mating pole cylindrical face (<Face 1>) for Concentric 11 and Concentric 2 mates. Check the Repeat box for these 2 mates. This will remember Face 1 for the 3rd and 4th step.
Next, pick the upper face of the Step (Face <2>). You should now see a preview of the spacer and step.
The final mate to pick is the Concentric3 mate. The pink highlight in the view above shows the mating cylindrical face needed to satisfy the mate. In the case of creating a spiral staircase, we pick the next hole counterclockwise from the hole marked with a notch.
Click the OK (green check) to complete the second step. Make two more copies rotating one bolt hole counterclockwise with each additional copy totally 4 steps.
Click the OK twice to complete the mating and exit the Property Manager.
There you go!
I hope you find this Copy with Mates tool helpful when copying multiple components to create new instances with mate when patterning just isn't an option.
Judy Marlo
Computer Aided Technology, Inc.

 Blog
Blog 