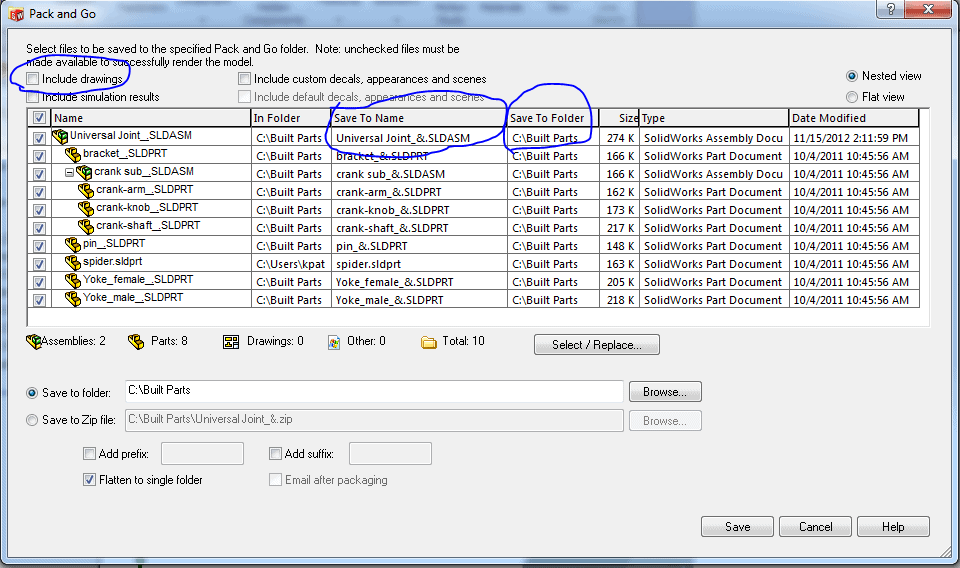
How to copy files using SOLIDWORKS Pack and Go
When you
don't use a file management system, keeping files organized can be a hassle.
So, what happens is users put all their part, drawing, and assembly files
into the same folder. This will cause issues when creating new revisions.
Once the deed is done and all files are in the same location there
will be a hefty price to pay to move files into the correct folder locations.
Pack and Go will help to keep the references from getting lost but you
will still pay with time.
To do this correctly, first have your file structure created on a
server or anywhere you like. Keep in mind that you will need to keep
track of your revisions and not just separate your parts, drawings, and
assemblies. Then starting with the main assembly drawing, whether it is being
opened from SOLIDWORKS explorer or Solidworks, go to Pack and Go. The
first thing I like to do is put a check next to Include Drawings. This will make sure you move/rename all the
drawings as well. Although you only have one option for a folder location
or zip file location, you can bypass this and change the file name and folder
location for each referenced file. Just
double click on the file name and location in the Save to Name and Save to
Folder respectively. The only down turn to this is that it will take some time
depending on how many files you have to move.
You will also have to do this for all the past revisions and
make sure they are properly located in the folder structure you create.

 Blog
Blog 