How to Batch Convert Files to the Latest Release of SOLIDWORKS
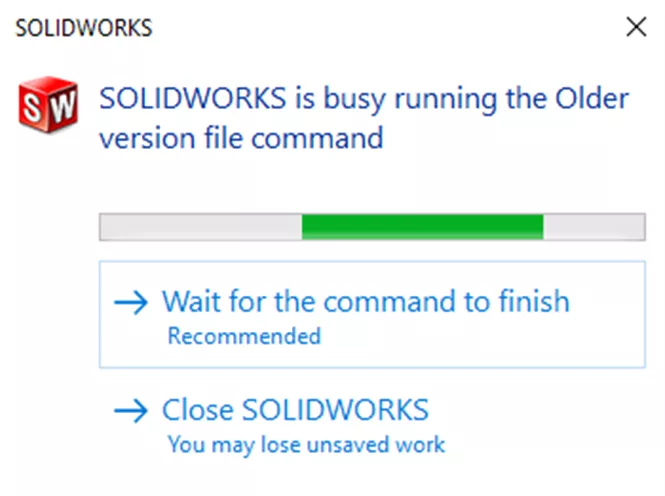
With each new release of SOLIDWORKS, the file format is updated to take advantage of the latest performance upgrades. Each time you open a file from a previous release of SOLIDWORKS, a message appears to inform you that this is an older file. When you save the file, you have to convert the files to the latest version first before saving it. The process is quick; you will hardly notice it. Sometimes we get asked, "Why does my computer have a hard time saving large files?" One reason is because of SOLIDWORKS is busy updating the files. If you have a large assembly with a lot of components, the first save time grows exponentially.
Update Your Files with SOLIDWORKS Task Scheduler Instead
Customers often ask what the easiest way to convert all their files at once to the latest version of SOLIDWORKS is. You can create a task in the SOLIDWORKS Task Scheduler to convert files from an earlier version to the current release. This optimizes the files for the latest software enhancements. You can create a task to convert files on your computer or create a distributed task* to run on a group of computers.
*You must have a SOLIDWORKS Professional, SOLIDWORKS Premium, or SOLIDWORKS Office license to create a distributed task.
Batch Convert Files to the Latest Release of SOLIDWORKS
You will find Task Scheduler in your Start Menu. First, click Start > SOLIDWORKS Tools (Year) > SOLIDWORKS Task Scheduler (Year).
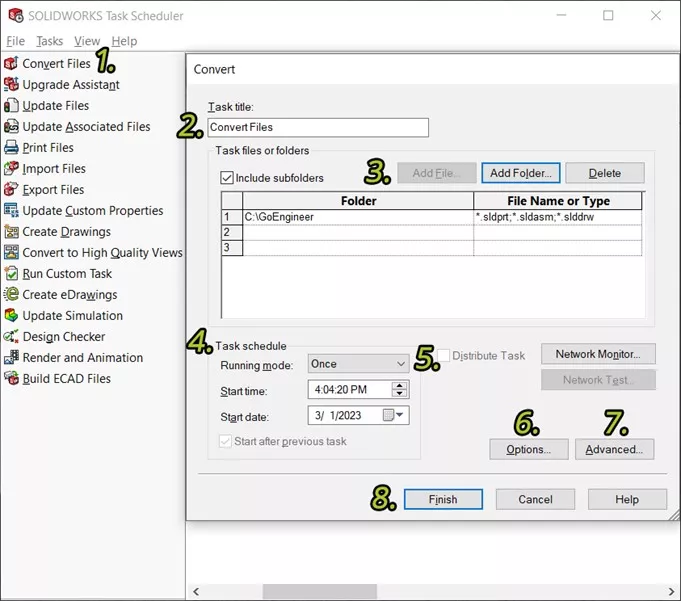
- Click Convert Files on the sidebar or pull down the Tasks menu and pick Convert Files.
- In the Convert dialog box, type a title for the task or leave the default.
- Select the files or folders you want to convert. Simply click Add File or Add Folder, select the files or folder to convert, and click Open. Repeat to select additional files or folders. If you do not want to include subfolders, uncheck Include subfolders. To delete a file or folder from the list, click its number or path, then click Delete.
- Under Task schedule, set the Running mode (specifies how often the task runs: Once, Daily, Weekly, or Monthly), the Start time, and the Start date.
- For distributed tasks*: Click Network Monitor if it is not running. Select Distribute Task. Click Network Test (recommended) to verify group read and write access to files and folders.
*You must have a SOLIDWORKS Professional, SOLIDWORKS Premium, or SOLIDWORKS Office license to create a distributed task. - Click Options to change conversion options and backup locations.
Note: Please back up all SOLIDWORKS files before converting them. Once files are saved in the latest version, they cannot be opened in an earlier release of SOLIDWORKS.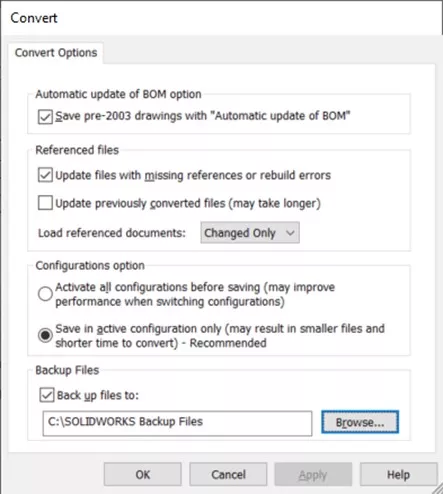
- Click Advanced to change the working folder, time-out values, and other options.
- Click Finish.

The Easy Solution – SOLIDWORKS Task Scheduler
Use SOLIDWORKS Task Scheduler to convert and optimize your files for use in the latest release of SOLIDWORKS. This lightens the load on the software when saving your files for the first time in the new version. Hopefully, this will improve your saving time for large files and assemblies when you make the jump to the latest and greatest version.
If you want to see a tutorial of how to use Task Scheduler to update your SOLIDWORKS files to the latest version, be sure to check out this video on our YouTube Channel.
![]() SOLIDWORKS Task Scheduler - Updating Files to Current Versions
SOLIDWORKS Task Scheduler - Updating Files to Current Versions
That concludes how to batch convert files to the latest release of SOLIDWORKS. To learn more about SOLIDWORKS, check out additional tips and tricks listed below.
More SOLIDWORKS Tutorials
SOLIDWORKS: Creating a Derived Centerline in a Twisted Sweep
SOLIDWORKS Solar Access Study Setup
SOLIDWORKS Dimensions Dialog Box Options
SOLIDWORKS Magnetic Mates Explained

About Neil Bucalo
Neil Bucalo is a Mechanical Engineer based out of Louisville, KY. Neil joined the GoEngineer family all the way back in 1997 at their Buffalo Grove, IL office focusing on support and training, technical writing, and web development. In 2002, Neil moved to Kentucky and joined his uncle, becoming a co-author and publisher of SolidWorks for the Sheet Metal Guy. Since late 2008, Neil has been back with the GoEngineer family as a certified SOLIDWORKS Support Engineer.
Get our wide array of technical resources delivered right to your inbox.
Unsubscribe at any time.