Adding a Serial Number - SolidNetWork License Manager
Ok, this shouldn't be so hard, but it's got several little hurdles, thus this blog posting 😉
(Ref. This is SOLIDWORKS 2010 as of SP 2.1)
- AT THE SERVER (the actual SNL server that's running the service.)
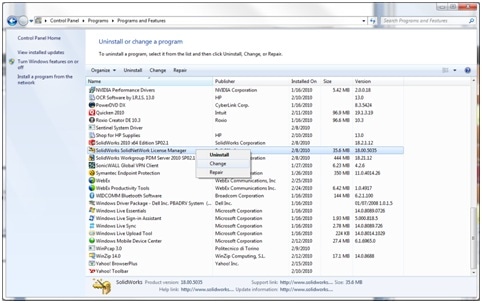
- We need to change the program: SOLIDWORKS SolidNetWork License Manager
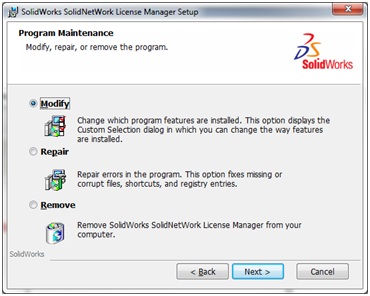
- The Setup Wizard should come up and we choose Modify
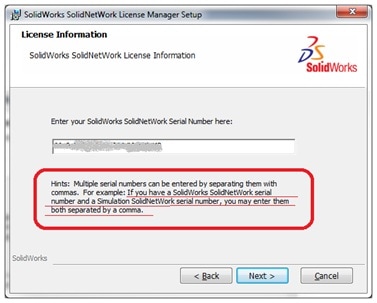
- A License Information window should come up, this is where we add the new serial number.
- Note the Hint in the window – very important!
- Hit the Next button. This will add the new serial number to registry properly. On the next screen, hit the Cancel button. This is the only change we needed to make.
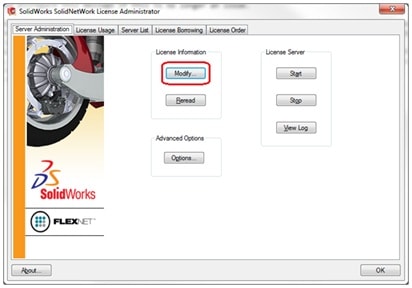
- Run the SolidNetWork License Manager
- On the Server Administration Tab, pick the Modify button.
- A SolidNetWork License Server Information window should come up, pick the Next button.
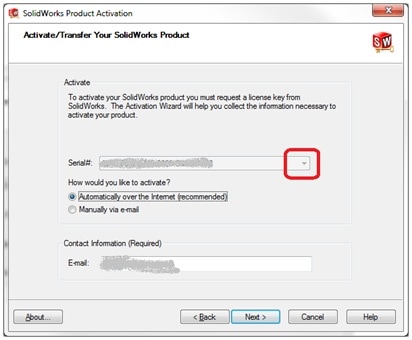
- A Activate/Transfer Your SOLIDWORKS Product window should come up, select the Pulldown for Serial#: and pick your newly added serial number.
- Pick the appropriate activation option. (Automatically over the Internet)
- Pick the Next button, wait for the activation to complete.
- As with any change, verify that the product license changes show as available on the License Usage Tab of the SolidNetWork License Manager. – Viola!
Jim Krivoshein

 Blog
Blog 